cookies · Family recipe · on USSR / Russia · sweet · traditional Russian recipe

Rozochki or Cream Cheese Meringue Roses

Rozochki or Cream Cheese Meringue Roses

Unintentionally – but quite justified – I’ve taken a sort of a sabbatical from my writing here. With all the editing of the translations of Turkish (!) soap operas and various documentaries and TV programs, I just seem to be not very fond of computer in the evenings. But let’s do it, let’s open this new year with a revival of an old recipe that our family friend once shared with my mother.

Rozochki or Cream Cheese Meringue Roses

Who knows how old this recipe actually is but my guess is that it came into our family no later than 1988 – judging from one of the ‘nearby’ recipes in My Mom’s cookbook that has this date next to it. And as you can imagine the recipe is pretty laconic (see the first one at the top of the picture above). Though I would rather call it – lacuna-ic. Just as I did with my Granny’s recipe for Jam-filled Cigars, this Soviet recipe was non the easier in terms of deciphering (or rather guessing) the instructions.

Babushka Vintage

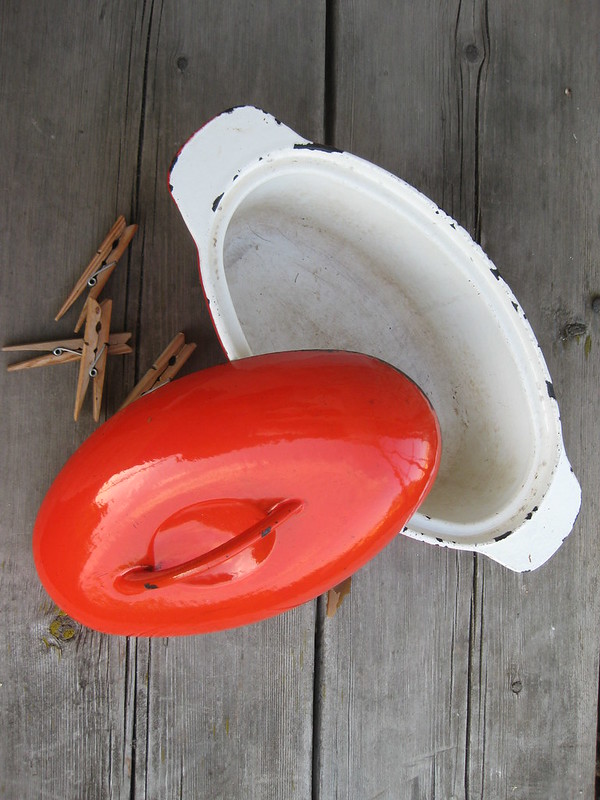
Before getting our teeth into the soft pastries / cookies, could we pause for a moment to marvel at this powder box from the early 1970s that belonged to my Granny. For no particular reason, just wanted to share with you my fascination for the Soviet ingenuity. Let’s unzip the box…

Babushka Vintage

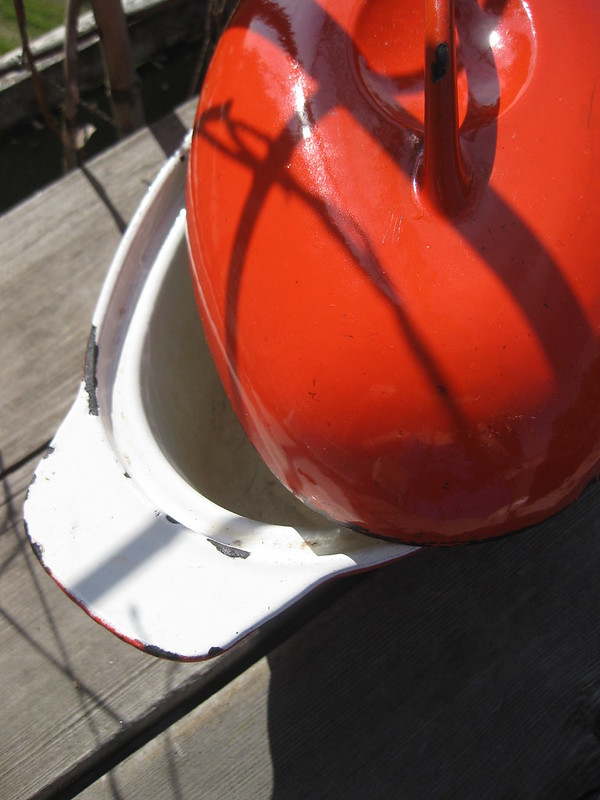
…And ho-o-op we find the mirror and the (metal!) protective screen with a tiny lock at its right. The engraved emblem says Leningrad and bears the most recognizable symbol of the city, the Peter and Paul Fortress. And then we turn the screen over…

Babushka Vintage

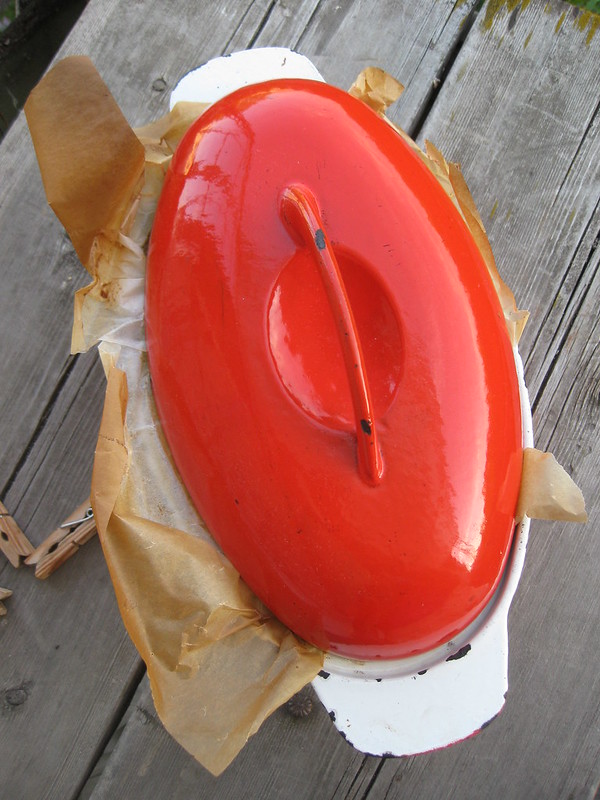
…To find yet another protective screen – a gauze one this time that covers powder puff and the powder itself. I remember that I used to play with this box when we were coming or even staying over at our Granny’s – I used to be a fan of all things ‘lady’, imagining myself in the times of Frances Hodgson Burnett‘s stories. The other paraphernalia that played the part in my imaginary life were my Granny’s super-fine gloves, a silk scarf and a straw hat. Oh yes 🙂

Babushka Vintage

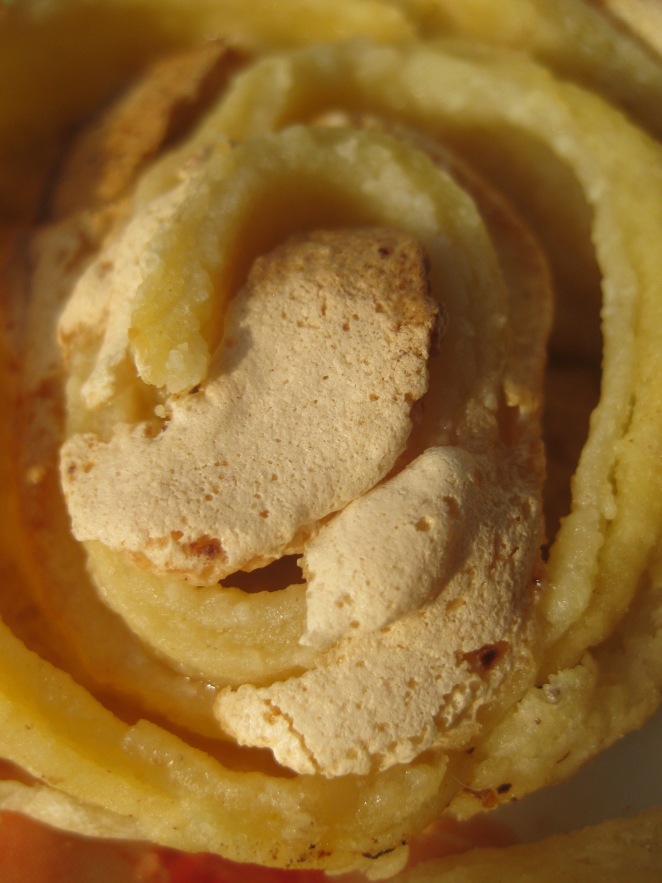
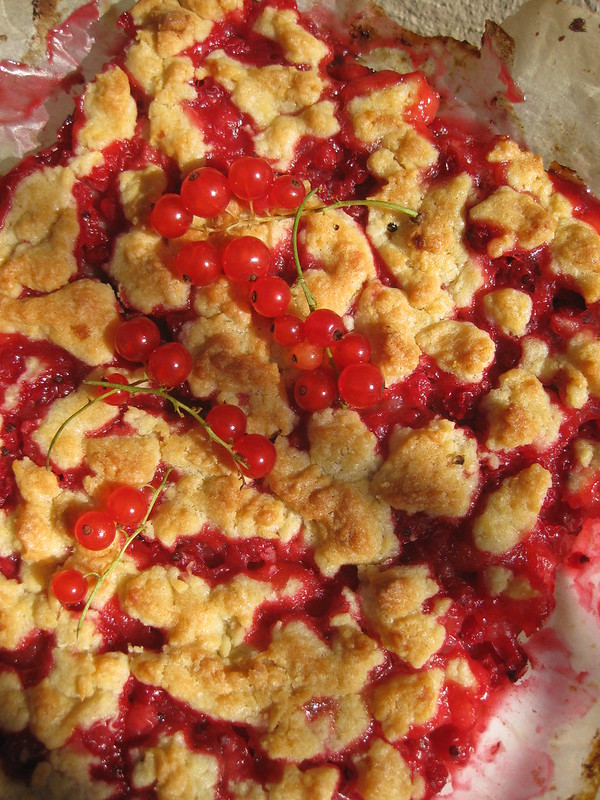
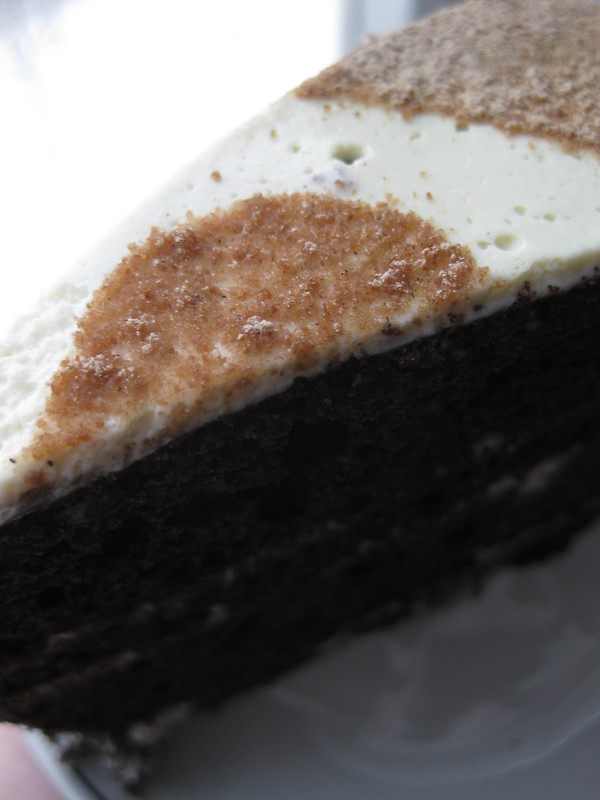
And now on to the food part – to the rozochki or small roses cookies (sic). The main trick with this recipe was that my mother couldn’t really recall the procedure. The instructions in her cookbook were apparently taken down at the time when they were pretty obvious and the only thing she might need were the exact figures for the ingredients. But since then (God knows when, late 1990s, I guess?) she has not baked these quasi-cookies at all and naturally the recipe has now presented itself as quite a riddle both to her and to me. But we did it, somehow.

Rozochki or Cream Cheese Meringue Roses

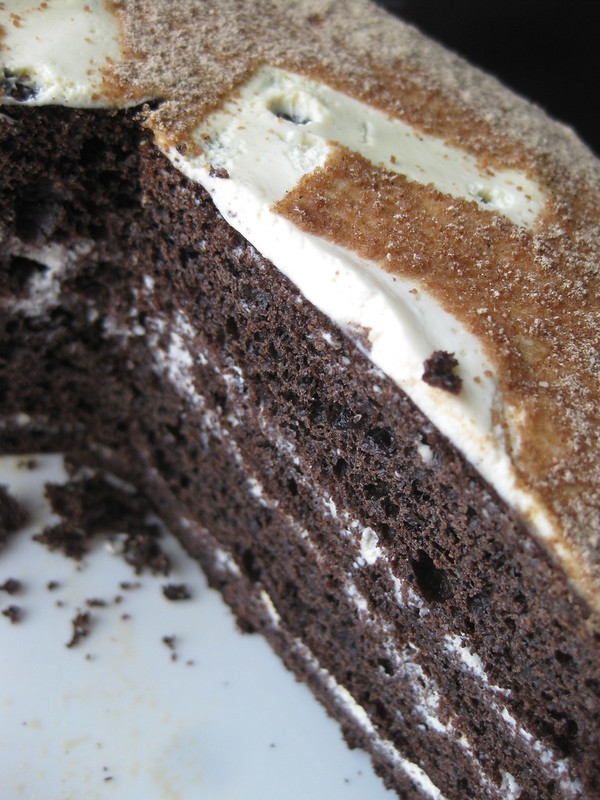
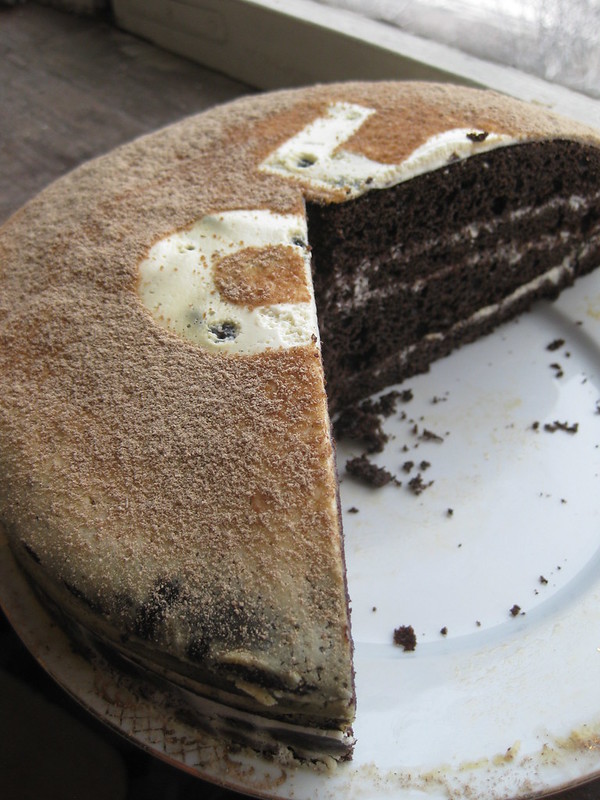
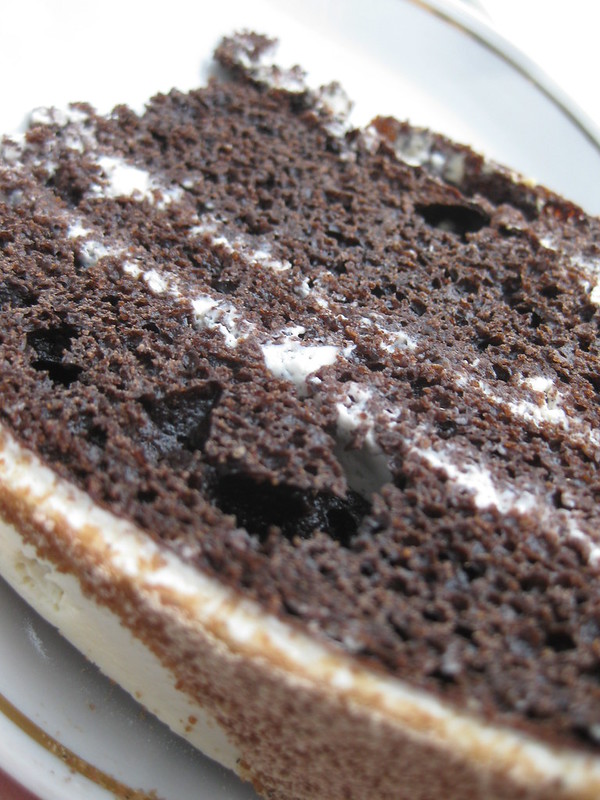
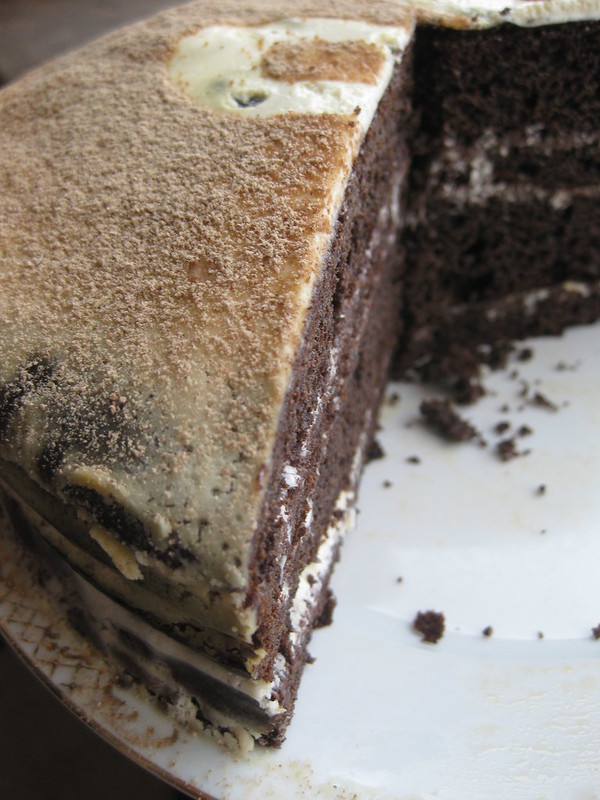
1 year ago – Bird Cherry Birthday Cake

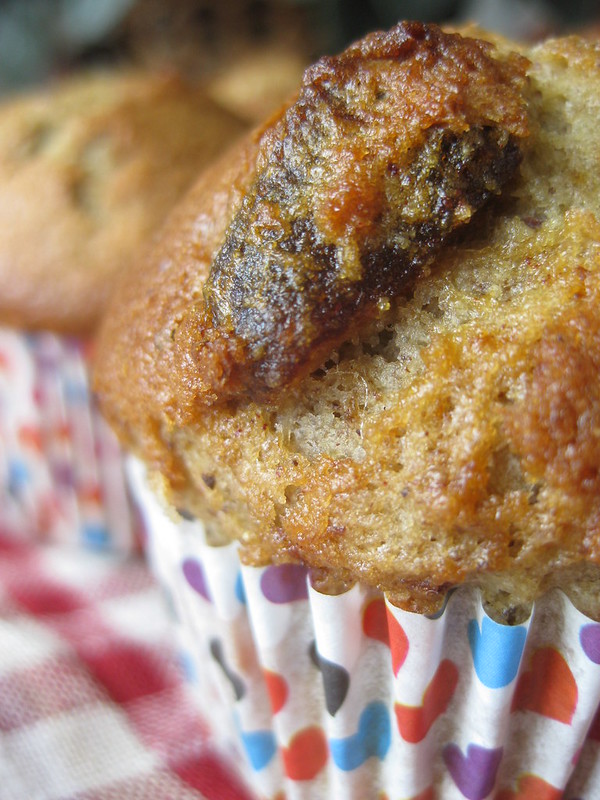
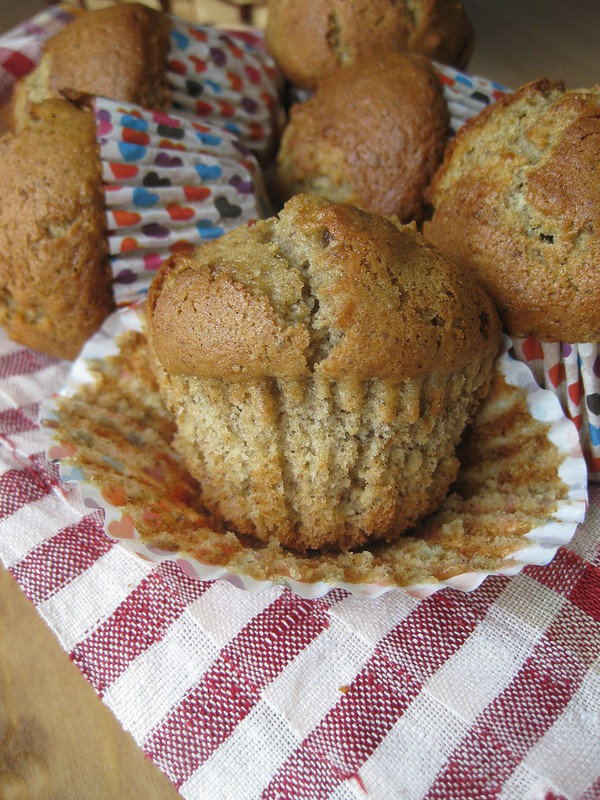
2 years ago – Peanut Butter Post

3 years ago – How to Make Silky Cream Cheese at Home (that’s what you do when you work from home)

4 years ago – Two Spinach Pies and Spinach…Rice

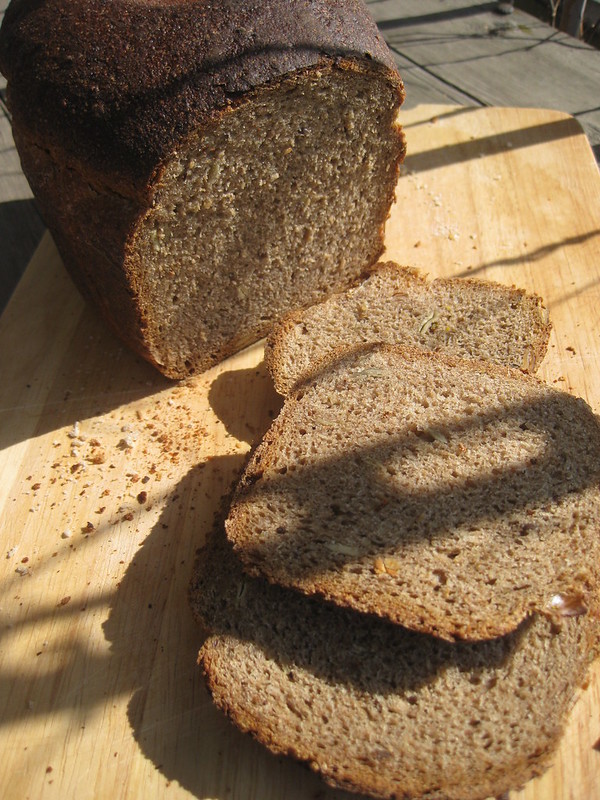
5 years ago – Rye Malt Bread, Two Versions

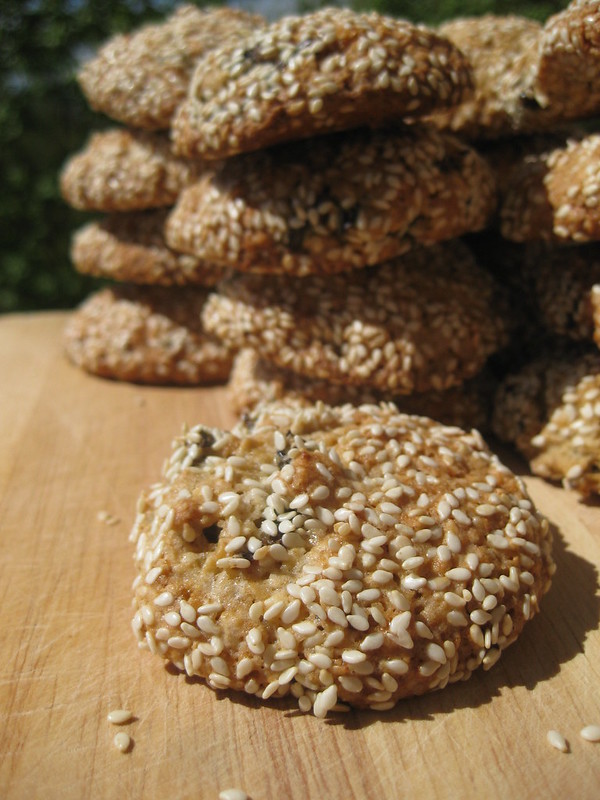
6 years ago – 2 Energy-Boosting Sweets to Keep Your Mind and Spirit Up

Rozochki or Cream Cheese Meringue Roses adapted from our family friend’s recipe.

Ingredients

For the pastry:

  • 1-1.5 cups cottage cheese – see remarks below
  • 100-120 g butte, softened
  • 2 egg yolks
  • 1-1.5 cups flour

For the filling:

  • 1 cup sugar
  • 2 egg whites
  • pinch of baking soda
  • pinch of salt

Procedure

First, make the pastry. Mix the cottage cheese with the butter and the two egg yolks, add in the flour. Adjust the amount of flour / cottage cheese in your pastry. It’s ok if the grains of cottage cheese are still visible. The consistency should not be very tough, just enough to be rolled out in some flour. Shape the pastry into a ball, cover and set aside (somewhere cool / cold).

Make the filling by beating the egg whites with the sugar, salt and soda with a hand-held mixer. The desired consistency here is what you would get with the meringue – a sort of a thick spreadable cream. Preheat the oven to 200-210 ‘C.

Now you can either roll out the entire piece of pastry or in parts. Use flour generously to avoid a sticky mess and rerolling. Roll it out into a rather thin rectangle and spread the filling quite generously onto the surface, leaving a margin on the long side (though the filling will start escaping anyway). Start rolling from the long end – gently and not tight – into a log. Cut the log across into as many pieces as you want (roughly two fingers wide) and carefully transfer onto baking paper / mat cut side up. Put your fingers round the bottom part and gently press them so that the upper part opens up into a ‘rose’. Repeat with the rest of the pieces and with the remaining pastry. Space the roses apart as they will puff up and also spread out even more in the oven (so you might want to bake these in two batches). Bake for 12 minutes on the middle rack and then 2 more on the top shelf (for the golden effect). Do not overbake these as they will hard up as they cool down and you don’t want to lose their softness!

Rozochki or Cream Cheese Meringue Roses

Remarks

A few words about the pastry: tvorog or cottage cheese should be quite dry, here the drier the better, so the grainy type will do as well. Mine was 5% fat. The less liquid you have in the pastry, the easier it will be to roll it out (and the less flour you will use).

The original recipe called for 200 g of margarine but it worked out fine with just half of it – and with softened butter, not margarine.

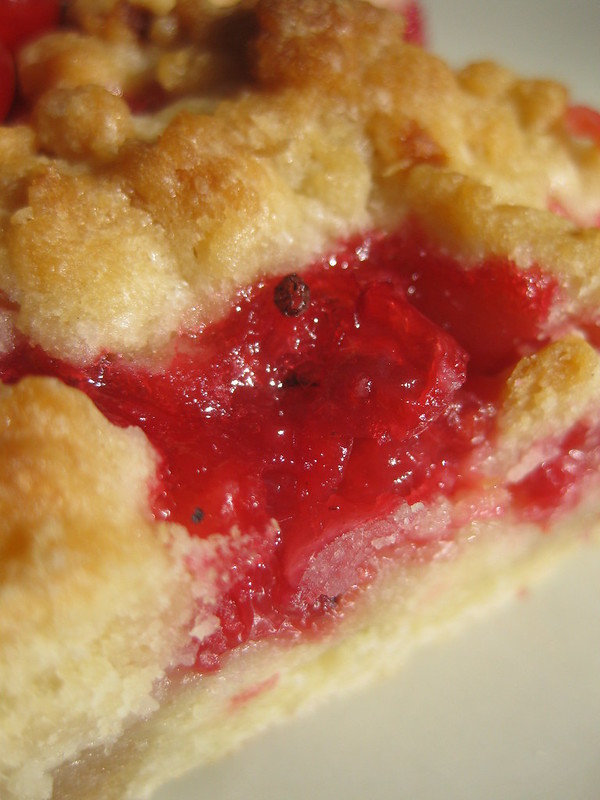
And yes, there’s absolutely no sugar in the pastry! But the super sweet filling plus the juices it creates while baking does the trick. The entire pastry is thus soaked in this juice and becomes sweet too.

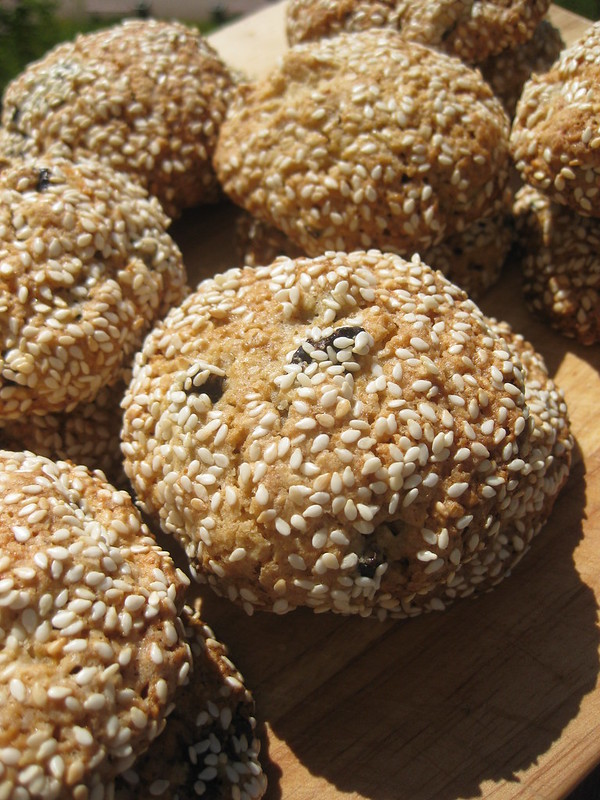
The bigger piece of pastry you take for rolling out, the more ‘petals’ (spirals) your roses will have. My first batch resulted in rather small roses (I rolled out smaller pieces) but the second one (featuring in the pictures here) was from a bigger piece of pastry, resulting in something that was more close to the original (as we remember it).

As we couldn’t really recall the procedure, the instructions above might not be the authentic ones but they were clearly the most optimal ones for these roses. The original recipe suggested eating these warm but when they cool down they are perfectly fine.

Rozochki or Cream Cheese Meringue Roses

Result

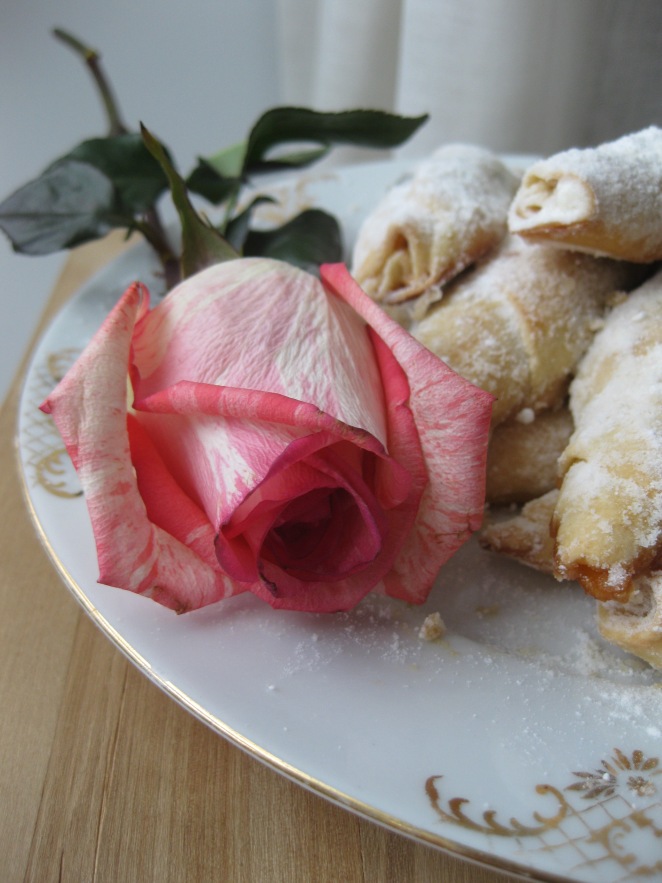
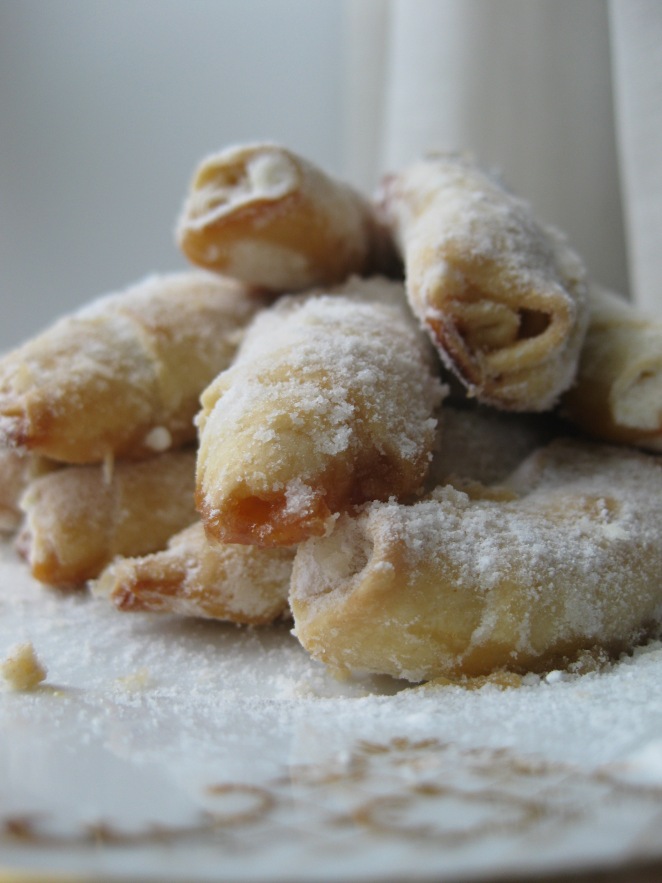
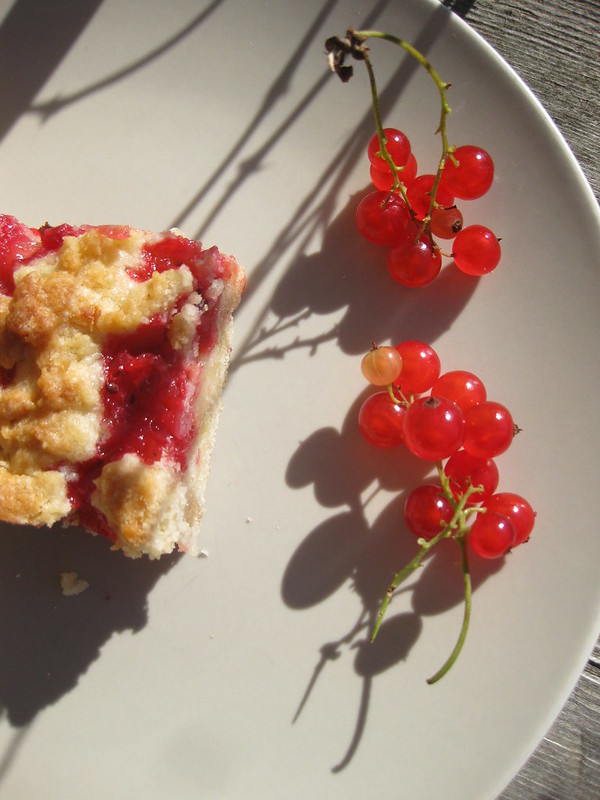
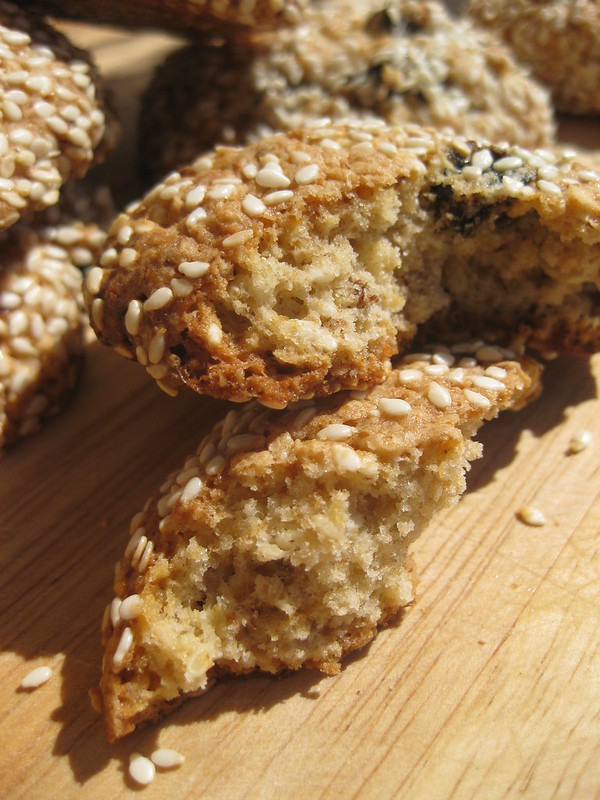
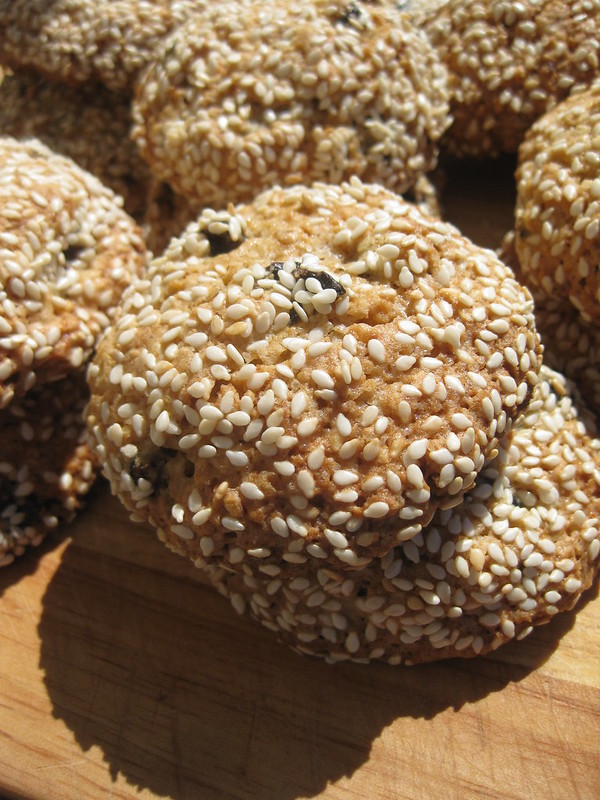
Very sweet and soft, these cottage cheese and meringue pastries will disappear before the second batch is ready. The combination of the chewy cheese pastry and the super-sweet meringue is addictive. Can constitute a sort of a warm meal for the sweet-toothed as these rozochki are pretty nourishing.

More Soviet recipes are here. And more Soviet paraphernalia in case you are interested is here.

G.

Family recipe · on USSR / Russia · sweet · traditional Russian recipe

Jam Cigars from my Granny’s Recipe Book

Jam Cigars from my Granny's Recipe Book

It’s been a week since my Granny died. A few hours before she actually died while turning my thoughts back to my Babushka I for some reason had a ‘vision’ of those sweet rolled things filled with jelly she used to bake – called sigary, i.e. cigars. I told myself that I would make them too.

Jam Cigars from my Granny's Recipe Book

Although in my mind I confused them with somewhat similar dessert – not with jelly but with nuts, I found a copy of the original recipe in my Mother’s recipe book and – a bit taken aback by the sheer… brevity of its instructions – I however ventured on this experiment.

Jam Cigars from my Granny's Recipe Book

Can we call it a traditional Russian recipe? Probably not. But this is definitely a Soviet recipe. Soviet recipes has at least three features in common. Firstly, they can have very vague ingredient measurements. Like this phrase ‘put as much flour as the dough will take’ which can mean anything from several glasses (Soviet cooks do not use cups) to a kilo or more.

Jam Cigars from my Granny's Recipe Book

Secondly, the procedure itself might be quite elliptical in its explanation. Like… no procedure at all, just the ingredients  or something like ‘bake until done’ without any indication of temperature, time or even any instructions on what to do before baking (how come you don’t know what to do if the recipe’s title is ‘cake’?!).

Jam Cigars from my Granny's Recipe Book

Thirdly, the ingenuity with which a Soviet cook would use the ingredients (the choice of which can be quiet scarce and / or striking to begin with) tells you a lot about the Soviet way of life in general.

Jam Cigars from my Granny's Recipe Book

The recipe in question is at the very bottom of the page, written by my Granny’s hand. Some of the instructions must have been added later, probably when my Granny’s memory started to fade a bit and she had to resort to more detailed recipes. I will share with you my Mother’s take on this recipe combined with my changes, so this is a true family recipe.

Jam Cigars from my Granny's Recipe Book

A year ago – Whole Wheat Biscotti with Chocolate and Pistachios

2 years ago – Finnish Sourdough Flatbread and Cookies with History

3 years ago – German, French and Polish Sourdough Bread

4 years ago – Winter Light and Lemon Cake

5 years ago – Winter’s Here. Time for Spicy Rye Bread

6 years ago – Flammekueche

Sigary or Cigars from my Granny’s recipe book

Ingredients

  • 200 g smetana or 15% fat sour cream
  • 180 g butter, melted*
  • 2-2.5 glasses or about 320-350 g flour
  • jelly / jam / confiture of your choice (tangy ones are best)
  • powdered sugar

Procedure

Melt the butter and add in the smetana. Start adding the flour gradually until you get smooth malleable dough. Optional – place your  dough covered into the fridge for about half an hour. Meanwhile preheat your oven to 190 ‘C**.

Take a piece roughly the size of a big walnut and start rolling it mostly in one direction so that you get a long strip resembling an oval. The thinner you roll your dough the more layers of it you will get in your cigar. Spread your jam over the dough in a thin layer leaving narrow margin on the edges. If your jam has bits of fruit in it, place a small bit in the middle of the strip. Start rolling the strip starting from the top edge (it’s somewhat easier this way) so that you get … well, a cigar. These cigars won’t spread so you can place them pretty closely on the baking mat but mind that the jam will most certainly leek out (I would suggest using silicon rather than paper – to collect all the jam drippings :).

Bake for about 20 minutes or until your cigars are nicely browned. They become crispy and pretty fragile when they cool down. While they are still warm, roll them in powdered sugar. The best here is home-made grounded sugar that will contain some larger bits as well – for a more Soviet-gourmet experience.

Jam Cigars from my Granny's Recipe Book

Remarks

As I was making this recipe I had to stop as I realized I didn’t really know what to do once I mixed all the ingredients. So I put the dough into the fridge, a step which was not in the recipe, until my Mother came back home and explained me the procedure. I guess you can omit it or give your dough a short chill anyway. For this recipe I used two types of homemade (Mother-made) jam – plum jam and apple jam – both with large bits of fruit in them. I had to pick out one piece of fruit per a cigar. You see, the dough itself is quite fragile so you probably won’t be able to put in a chunkier jam. My Granny’s side note says that you can add some sugar to the dough but I wouldn’t do that as the jam provides all the sweetness you need.

* I reduced the amount of butter in this recipe – the original recipe actually called for margarine as it was and still is much cheaper than butter.

** We had to experiment with the oven temperature with the first batch. For some reason my Mother thought that these should be baked at a pretty low temperature, so we started somewhere at 120’C and them moved up to almost 200 as the cigars just wouldn’t brown. We baked our second batch at about 190’C for exactly 21 minutes.

Result

Sweet and tangy, crispy but moist too. Such a treat! One of those things I haven’t tasted for years.

I intend to make more recipes from my Granny’s recipe book. There are those that with just their taste can bring back so many childhood memories.

And no, I do not smoke and in no way do I promote it!

Adding this post to the Sweet recipe collection.

G.

no-dough · sweet · vegetarian

Tasty but Tricky Experiments with Agar-Agar

Agar-Agar

Agar-Agar or simply agar is a vegetarian alternative to gelatin, made from a certain species of algae. Algae – for dessert?! Exactly. Agar is neutral in flavour and is considered to be pretty wholesome as it is 0% fat and 80% fiber. Although I’m not a big fan of these jelly things, I was surprised at how flexible they are and how creative they allow you to be.

Agar-Agar

Making desserts with agar-agar turns out to be very easy – though a bit tricky at times. For instance, if you try to cheat on the amount of the agar-agar powder you’re using you might end up with a sort of tasty compote instead of jelly… You see, with my third jelly experiment I was having my Scrooge moment, which was a very bad timing. Well, two successful attempts out of three is a pretty good result.

Agar-Agar

Be careful when selecting your agar-agar powder: 10 g of seemingly same substance can have a very different effect. I bought two different brands and found out one was twice (if not thrice) more powerful than the other. So do read the instructions on the packaging – if it says 10 g per 400 ml, do not try to increase the amount of liquid.

Agar-Agar

1 year ago – Ryazan and a Bit of Moscow

2 years ago – Orange Coloured Post: Glazed Orange Cake and Persimmons

3 years ago – Sugary Knots from My Babushka’s Recipe

4 years ago – Winter Light and Lemon Cake

5 years ago – Those Were the Days or 90s in Russia Continued

6 years ago – Birthday Mega Torte and Lots of Flowers

Fruit Jelly will make quite a few portions of sunny jelly with chewy fruit bites.

Ingredients

  • 800 ml of liquid – or half water half orange juice plus a splash of freshly squeezed lemon juice
  • 4 tsp agar-agar powder (read the instructions on the packaging!)
  • 100 g sugar
  • 2 tangerines, peeled
  • 1 small apple, diced

Procedure

Pour your liquid into a large non-reactive pot, put it on medium heat, and add the agar-agar powder teaspoon by teaspoon, whisking well after each addition. Add your sugar and whisk well. Add your fruit.

When the mixture starts boiling, whisk regularly for 5 minutes. You should notice how really thick it gets. Leave the mixture in the pot for a bit and then pour it into desired forms like cocktail glasses, shots or small glass bowls. Leave to set completely and then store in the fridge (just in case).

Agar-Agar

Remarks

I can imagine you can add spices and virtually anything to the mixture, depending on your idea of a perfect jelly. If you want your fruit chunks really crunchy, put them into the pot closer to the end of cooking – or add them when the mixture starts boiling for a more ‘mushy’ result. The fruit jelly was somewhat nicer in texture than my previous (first) attempt with mixed frozen berries – I added them before the mixture started boiling which increased the amount of liquid and reduced the jellying power of agar-agar. So frozen fruit might be that tricky ingredient which spoils the whole thing, who knows. However, berries add that tang and a nice deep red wine colour to your jelly.

Agar-Agar

Result

Sweet, soft in texture with chewy fruit chunks. Can also be used as an extra sweetener for your piece of cake (spreads well) or even your oatmeal / muesli. A flexible recipe that you can adapt to anything you have on hand at the moment.

Agar-Agar
Adding this post to the Apples and the Sweet recipe collection.

G.

pies · sweet

Red Currant Pie with Ground Oats and Peanuts

Red Currant Pie

Berries from dacha. Some of them are now frozen, some of them turned into a sort of zhivoe varenye (live confiture, consisting of berries strained with sugar, no boiling involved – the best way to preserve all the good stuff in the fruit), some of them eaten raw (gosh, they are so sour!) and some end up as a filling to numerous cakes, muffins and this time also a pie.

Red Currant Pie

This summer with June and July almost sun-less, has not given the berries enough sugar so they are eeeextra sour. Thanks God, no apples this year – I can only imagine how sour they would be…

Red Currant Pie

Red currants are traditionally extremely sour. Yet, I like baking with them, they seem to give that special ‘it’ to the cakes and pies.

Red Currant Pie

After making quick cakes and muffins, I’ve finally got over my laziness and here’s a pastry pie I baked today with the last red currants from our dacha – soft and zesty. Why peanuts in a berry pie? Well, I just had some in front of me.

Red Currant Pie

Same goes with why I decided to add this tolokno (see Remarks below) layer to the pie 0 I guess I just had it on the table at that moment too! However, it seems it was not that bad an idea after all – it has given the berries an extra soft (and sweet) layer and also prevented the juices from destroying the bottom of the pie. I think it worked in a sort of custard-y way.

Red Currant Pie

1 year ago – Lemon-Gooseberry Bars

2 years ago – Greek Olive Buns and Breadsticks

3 years ago – Spanakopita and Mediterranean Vegetable Millefeuille

4 years ago – Summer Goes On with Sourdough Mini-Rolls

5 years ago – Pommes. Pommes de Terre too

Red Currant Pie with Ground Oats and Peanuts

Ingredients (as with most of my recipes – the amounts are very approximate!)

  • 150-200 g sugar, divided
  • lemon zest, to taste
  • 90-100 g butter, cold or from freezer
  • pinch of salt
  • 1 egg
  • handful of peanuts, ground into flour
  • all-purpose flour, enough for the pastry
  • 2-3 Tb oat flour (preferably tolokno or kama, see Remarks)
  • 1/2 cup warm water, or more as needed
  • fresh red currants

Procedure

First, make the pastry. Cut cold butter into small pieces, mix in about 50-70 g sugar, depending on how sweet you want your pastry, lemon zest and the egg. Working rather quickly before the butter softens too much, add a pinch of salt, ground peanuts and start adding all-purpose flour, delicately but swiftly kneading the pastry with your hand. My idea was to make it rather soft and crumbly so I did not knead it into a disk. Leave the pastry covered in the fridge for at least 30 min.

Meanwhile, prepare the oat flour layer. I used the easiest method for making kasha from tolokno (see Remarks), by mixing it gradually into a small bowl with some warm water, adjusting the amount of flour to achieve rather thick consistency. Add in about 50 g of sugar (the mixture will get more runny).

Line a round or rectangular baking dish with parchment paper. Take the pastry out of the fridge and distribute a bigger (2/3) part of it on the bottom, by gently rubbing it through your fingers. In this way you’re creating a more ‘aerated’ sort of pastry layer rather than a smooth one, so no worries if there are ‘holes’ in the bottom layer. Keep the rest of the pastry in the fridge.

Pour the oat mixture over the bottom pastry layer and scatter red currants on top, finishing with some more sugar, depending on the sweetness of your berries (ours are as usual super sour). Take the remaining pastry from the fridge and rub it through your fingers over the berries. There will be more spaces in the top layer with berries popping out as you’ll have less pastry for it but that’s exactly what you need.

Preheat the oven to 180’C. Bake for about 40-45 min. until the top layer is golden and the berries are happily bubbling away.

Red Currant Pie

Remarks

Tolokno aka kama or talkan, is a traditional grind of slightly toasted whole oats, considered to be healthier than what you get with the industrially milled oats. In Karelia they eat it with berries and it’s such a treat! You can of course use oat flour or grind some oatmeal instead.

Red Currant Pie

My pastry ‘recipe’ is not anywhere close to what you would call classic, so feel free to use your favourite recipe. Anyway, I have to confess, putting enough butter into the pastry does make a difference – it’s just what I wanted – soft and crumbly!

Red Currant Pie

Result

Sweet-n’-sour in one bite, very soft and peanut-y, with distinct flavour from the oats detected.

Red Currant Pie

This recipe goes to the Berries and Sweet collections where you will find many more recipes with red currants in particular, like Cardamom and Red Currant Cake, Coconut Red Currant Bread, Pretty Good Red Currant Coffeecake, Moelleux aux Groseilles or Redcurrant CakeRed Currant Meringue Pie, Red Currant Flan and Red Currant and Marzipan Swirls among others.

G.

cookies · muffins · sweet

Sugarless: Oatmeal Cookies and Fruit Muffins

Sugarless Oatmeal Cookies

My sister is temporarily on a no-added-sugar diet so I’ve been experimenting with sugar-free baking for a while. She is also avoiding honey and industrially made juices which turned it into a bit of a challenge. So bananas, dried fruit and fresh fruit have all been summoned instead to substitute sugar and make my sister enjoy her meal anyway.

Sugarless Oatmeal Cookies

Here are two of the recipes I’ve come up with: oatmeal cookies and muffins with dried fruits and fresh apples.

1 year ago – Trans-Siberian Trip Part 4: Siberia Begins with Tyumen

2 years ago – Birthday Kovrizhka and Chocolate Chip Muffins

3 years ago – While Zucchini Are in Season…

4 years ago – Italian Delicacies a la Russe

5 years ago – Fruit Post

Sugarless Oatmeal Cookies

Ingredients

  • about 300 g old-fashioned oatmeal, roughly ground (or a mixture of oats, rye, barley and wheat flakes) plus some quick-cooking oats, whole
  • 60 g butter, softened
  • 2 eggs
  • 1 banana, preferably overripe
  • dried apricots and dates, chopped
  • sesame seeds, ground
  • mixed nuts, roughly ground
  • optional add-ins: ground flax seeds (aka coarse flaxmeal), flax bran*, wheat germ
  • 1 tsp baking powder
  • cinnamon, cardamom
  • pinch of salt

Procedure

First, beat butter with the banana and eggs, then add the rest of the ingredients in no particular order (I added while quick-cooking oats last). Adjust the amount of flour and/or add-ins according to the consistency. Cover and Let chill in the fridge for at least half an hour. Then form dough balls (preferably the size of a small tangerine) and place on a baking mat / baking parchment. The cookies won’t spread so mo need to space them a lot. Slightly flatten the balls with your finger.

Bake in the preheated oven at 180-190 ‘C for about 15 minutes (depending on size). My cookies did not brown much on the top but looked apparently cooked on the bottom.

Remarks: Add more dried fruits for a sweeter result. These smell delicious in the oven!

Result: Cheeeewy cookies for those on a sugar-free diet; for sweet-tooth people these cookies won’t be as attractive though they definitely contain quite a lot of nutrients and healthy stuff.

And here’s the other recipe:

Sugarless Fruit Muffins

Sugarless Fruit Muffins 

Ingredients

  • 3 small eggs
  • 100 g dried apricots
  • A handful of dates
  • A handful of hazelnuts, toasted
  • 2 tsp baking powder
  • 1/2 tsp baking soda
  • 150 ml sour cream (smetana)
  • 50 ml sunflower seed oil
  • Flax bran*, wheat germ, ground flax seeds (aka coarse flaxmeal), ground old-fashioned oatmeal
  • 200 g all-purpose flour, adjust the amount accordingly
  • A tangerine, peeled and chopped
  • Half an apple, diced
  • Cinnamon
  • Sesame seeds, for decoration

Procedure

Scold dried fruits with boiling water, drain, pour some more hot water and let them soak (I usually use a colander placed on a deep bowl). When they get soft enough, drain them (you can use the water in the recipe but I chose sour cream instead) and stone the dates.

In a blender, reduce dried apricots and hazelnuts into a sort of chunky puree (I left dates un-blended). Beat eggs with sour cream, then beat in the oil. Add the fruit and nut mixture into the eggs. Thoroughly mix baking powder, baking soda and cinnamon into the flour and add it to the eggs and fruit mixture. Add the extras (ground oatmeal, bran, germ, flaxmeal) and the dates. In a sort of a last-minute inspiration, add in chopped tangerine and some apple. Mix well but do not overmix.

Preheat the oven to 210’C. Divide the batter into the muffins cups and sprinkle sesame seeds on top. Bake for about 17-20 minutes (mine were baking on the upper shelf together with bread below them). Left sit in the cups a bit and then leave them cool on a wooden cutting board.

Sugarless Fruit Muffins

Remarks: I added flaxmeal hence this somewhat darkish colour but you can add any healthy extras you desire. Same applies to the dried fruits, nuts and the last-minute ingredients you throw in – choose them to your liking but don’t forget to check that the dried fruit do not contain added sugar (sometimes they do add it to the cranberries). You can also add extra chopped dried apricots or mash in a banana for a sweeter result.

Result: Though you have to be on a no-sugar diet to appreciate these in terms of their very low sweetness, the muffins are soft, good in texture (not rubbery as I feared) and they rose nicely.

Adding these recipes to my Sweet collection.

*Flax bran – a recently discovered flax seed-derived thing, looks like very roughly ground golden flax seeds. Might be just a new name for coarse golden flaxmeal (as opposed to the more traditional ‘dark’ flaxmeal). Been adding it to my sweet baking.

This post was made using mobile phone pictures. But I think I’d rather keep to my good ol’ camera!

G.

no recipe · on USSR / Russia · sweet

Midsummer Post about the Best Russian Ice Cream

Sakharnaya trubochka ice-cream

This year’s midsummer post is about the best ice-cream in Russia – sakharnaya trubochka or sakharny rozhok (sugar tube / sugar cone). Although this type of ice-cream is traditionally associated with its сountry of origin, Italy, where it is known as cornetto, millions of Soviet kids are forever grateful to a worker of the First Leningrad Refrigerating Plant for inventing a waffle-rolling machine… and thus making their lives a little bit merrier.

Sakharnaya trubochka ice-cream

Personally I’m not a big fan of super-sweet ice-cream with dozens of add-ins – I prefer the plain vanilla ice-cream in crunchy waffle instead. The extra-creamy one. Glazed with chocolate that delicately breaks when you have your first bite. With that tiny ‘tail’ of the sugary waffle cone filled with chocolate. And that’s exactly what you get with sakharnaya trubochka. An even plainer type of ice-cream that I also like is vafelny stakanchik, vanilla ice-cream in a waffle cone shaped as a glass (hence the name). And contrary to the gelato or other ice-cream-ball-types, it’s filled with the creamy stuff right to the end.

Sakharnaya trubochka ice-cream

By the way, they’ll never get you if you say you’d like a sakharnaya trubochka (tube) in Moscow – they call it rozhok (cone, cornetto) there instead. Well it’s true, it doesn’t really look like a tube but this name just caught on and if you ask kids in St Petersburg which ice-cream they are dreaming of, they’ll immediately say ‘trubochka‘.

Sakharnaya trubochka ice-cream

As its very Soviet name suggests, the Leningrad Khladokombinat #1 was the first refrigerating plant (cold-storage facility) to open in Leningrad in 1934 – and the first one in the country to start producing this very type of ice-cream. The legend has it that a worker from the Experimental workshop Dmitry Smirnov invented waffle-cone-rolling and filling machine and the country has been thoroughly enjoying sakharnaya trubochka ever since (more precisely, since 1946). They say he was also responsible for inventing other mechanisms thus making such ice-cream types as stakanchik and briket (a brick of ice-cream in-between two layers of waffles) available in the USSR.

Sakharnaya trubochka ice-cream

Although they claim they still make this ice-cream according to the state-imposed and state-controlled standard (GOST), Sakharnaya trubochka‘s list of ingredients these daysdoes not seem particularly enticing (I doubt they had coconut butter E476 and soy lecithin back then). However, the main ingredients are still there: cream, milk, condensed milk, butter and vanilla for the ice-cream itself, flour, sugar, butter for the waffle and cocoa for the glaze. Warning: when buying a trubochka, check if its cone is hard enough, otherwise you will miss on the  bet part of it – the crunchy sugary waffle cone.

Previous year’s midsummer posts:

2016 – Spinach Pie with Phyllo Pastry for Midsummer

2015 – Midsummer: Samovar, Teacups and Saucers

2014 – Midsummer Roses in Pavlovsk and Almond Puff

2013 – Midsummer Berry Smoothie

2012 – Midsummer’s Black Currant Rhubarb Cake

Adding this post to the On USSR / Russia collection.

P.S. I took these photos last year in August when I had my one and only ice-cream of that summer. This summer I had it a bit earlier in July but this year again it’s not that type of summer in St Petersburg when you would want an ice-cream every day. Global warming is definitely happening somewhere else.

G.

muffins · sweet

Vintage Soviet Cookware and Date and Hazelnut Muffins

Mom says it’s not that vintage claiming they bought this glazed iron dish in the 80s, but to me this looks like 60s, doesn’t it? I rediscovered it at my grandparents’ place, and since it’s been out of use for quite a long time, I’ve decided to bring it back to life. Cooking in vintage (and pseudo-vintage) dishes and pans certainly adds up to the whole process, making it more enjoyable in a way.

Vintage Cookware

I’ve already tried baking bread in this vintage Soviet cookware twice and I must say it takes a bit longer than in my previous (and unfortunately now broken) glass baking dish.

Vintage Cookware

The bread turns out quite moist with thick crust, reminding me of that bread you would buy some years ago (good ol’ times, ya know).

Vintage Cookware

I baked the loaves about 25-30 minutes with the lid on and then about 25-30 minutes more without, including some minutes out of the dish as well.

Vintage Cookware

The first time I baked in this dish, the lid left an indent in the top of the loaf, the other time it didn’t. Both times I used baking parchment although I should probably try greasing the dish for a change to see how it goes.

Vintage Cookware

And here’s the sourdough rye bread baked with that very flexible recipe I’ve been using for quite a while – makes you pretty lazy though cause it’s so fool-proof and easy:

Bread in Vintage Cookware

And now on to another lazy recipe. There’ve been quite a few dried fruit recipes in the kitchen (and in my blog) recently. Well, you see, with this very capricious autumn-like summer in St Petersburg one has to find some solutions to substitute the energy you would otherwise get from the sun (and good mood). And even though we can buy nectarines from Tanzania (!), they all taste a bit bland (and sometimes are hard as wood), so you naturally turn to using dried fruits and nuts instead.

Date and Hazelnut Muffins

A pretty nice combination from my recent experiments – dried cranberries, walnuts and dark chocolate in a sort of spice cake, with brown sugar creating a crunchy crust, and these date and hazelnut muffins:

Date and Hazelnut Muffins

1 year ago – Spinach Pie with Phyllo Pastry for Midsummer

2 years ago – Rolling Pin Recipes: Flatbread, Pie and Sweet Buns

3 years ago – Two Ways To Make Russian Carrot Patties

4 years ago – Soviet Kitchen Heirloom

5 years ago – Sourdough Bread with Dates and Flaxseeds

Date and Hazelnut Muffins recipe will make 12 coffee-flavoured muffins. The amounts of the ingredients are quite approximate!

Ingredients

  • 2 eggs
  • 150 g sugar
  • vanilla extract
  • 50 ml sunflower oil
  • ginger
  • baking powder
  • baking soda
  • 300 g flour mixed with ground flaxmeal and flaxmeal flour (super fine ground flaxmeal, aka flax porridge), approximately
  • 1/2 tsp ground coffee
  • orange juice
  • chopped dates
  • roughly chopped hazelnuts, toasted / microwaved

Procedure

Beat eggs with sugar, add vanilla extract and sunflower oil. Mix flours with baking powder, soda, coffee and spices, and add the flour mixture to the eggs alternating it with orange juice (I usually do it in 2 doses, starting and ending with flour. And if I add too much of either dry ingredients or liquids, I just add more of the other). Do not overmix. Add chopped dates and nuts. Divide the batter among 12 muffin cups (I was using paper cases too) and bake in the preheated to 210 ‘C oven for about 20 minutes.

Date and Hazelnut Muffins

Remarks: I added two kinds of flaxseed meal / flax flour to these muffins, a rougher and a finer grind. I think adding bran or some other kind of flour would work as well.  

Result: These are sweet muffins, with a crunchy sugary crust and a delicate coffee flavour – just a hint! They puffed up nicely too. And who doesn’t like those tasty-tasty hazelnuts?

This recipe goes to my Sweet collection where you will find more muffins and dried fruit recipes.

G.

cookies · sweet

Oatmeal Cookies with Sesame and Prunes

Oatmeal Cookies with Sesame and Prunes

Before I start a whole series of posts with my recent Crimea trip, here’s a quick recipe of crunchy oatmeal cookies with sesame seeds and prunes. Less words, more oats! 🙂

Oatmeal Cookies with Sesame and Prunes

1 year ago – Working Class Hero: Down-to-Earth Vyborgskaya Side

2 years ago – Addictive Grissini and Sourdough Bread Twists

3 years ago – Pear Clafoutis, Jelly Muffins and Scandinavian Twists

4 years ago – Colours of Summer

5 years ago – Gros Sablé Breton or Je ne Mange pas Six Jours

Oatmeal Cookies with Sesame and Prunes will make crunchy sesame-flavoured cookies perfect for the capricious St Petersburg summer. ATTENTION: the measurements are given in a very approximate manner…

Ingredients:

  • 2 eggs
  • 200 g sugar
  • 50 g butter, softened
  • 50 g sunflower oil
  • 250 ml of oatmeal mixed with some oat bran (I used medium-sized oatmeal, not the instant type nor the old-fashioned)
  • 150 g oat flour (I used tolokno, a rough grind of oats) mixed with some all purpose flour
  • pinch of nutmeg
  • 2 tsp baking powder
  • 1/4 tsp baking soda
  • pinch of salt
  • prunes, chopped (to taste)
  • sesame seeds, plus extra for coating

Procedure:

Beat eggs with sugar, add softened butter and oil, continue beating well. Beat in the oatmeal and oat bran (you can omit the former if you want), baking powder, soda, salt and nutmeg and then add oat flour mixed with some all purpose flour, enough to achieve a rather thick mixture. Mix in chopped prunes (I scolded them with boiling water beforehand) and sesame seeds. Ideally, you should get a pretty thick mixture that will allow you to skip the chill-in-the-fridge step (to save time). But you can of course place the cookie dough in the fridge (no need to cover) for some time (20-30 minutes) first. I baked the first batch right away while the rest of the dough was waiting in the fridge (can’t say there was much difference in the end).

Oatmeal Cookies with Sesame and Prunes

Preheat the oven to 175 ‘C. Take a small ball of cookie dough (moistening your hands with some water might help), roll it in sesame seeds and place it on the baking mat / parchment paper, then slightly flatten it with your hand. Continue with the remaining dough (the cookies will spread while baking so consider making two batches). Bake for about 20 minutes but be careful – do not overbake otherwise the cookies will be a bit too crunchy!

Oatmeal Cookies with Sesame and Prunes

Remarks: Prunes are really quite distinct in these cookies, so if you prefer a more neutral dried fruit or something more traditional, try making these with raisins. You can also experiment with flour, adding some whole wheat flour for a change.

Result: Crunchy, pretty sweet cookies, with an accentuated sesame flavour … and sesame crunch 🙂

Oatmeal Cookies with Sesame and Prunes

As I was taking pictures on the balcony, one of the cookies did fall from the fifth floor. It survived the fall almost intact apart from being attacked by an ant when I went out to find the errant cookie. Then we used the good Soviet anti-microbes solution which worked well with the unpacked bread they used to sell in the USSR and in the 90s: scorch the thing holding it close to the gas burner and turning it from all sides – and you are safe!

This post goes to the Sweet recipe collection where you will find more cookie recipes.

G.

St Petersburg · sweet · traditional Russian recipe

Bird Cherry Birthday Cake

Bird Cherry Cake

This is my second attempt at making a Cheryomukhovy Tort or Bird Cherry Cake. You might have never heard of this bird cherry tree at all. You might have never even thought you could eat anything made from it. And yet it is one of the traditional ingredients in the Northern and Siberian cuisine.

Bird Cherry Cake

Last summer for instance we tried some bulochka with bird cherry filling in the Urals.  And my first attempt at making a bird cherry cake was back in 2014, after I bought a small package of bird cherry flour in Novosibirsk. This time I managed to get the flour in St Petersburg – it can be found in eco / bio / health stores and even in bigger supermarkets in the baking department. Funny enough, the flour I bought during my roaming on Vasilyevsky island last year is produced in Ulan-Ude, where we suffered from extreme heat just a couple of month earlier, in the summer 2016.

Bird Cherry Cake

I have doubts that the bird cherry flour can be found that easy outside Russia, so if you go on the Trans-Siberian one day, do try this thing. Such a distinct flavour – of almonds and some booze at the same time! This is why I decided to make a bird cherry cake for my Grandpa’s 85th birthday – something different for a change. And here is the recipe. And although you might never actually use it you will at least know how this exotic thing is made.

Bird Cherry Cake

1 year ago – Peanut Butter Post

2 years ago – How to Make Silky Cream Cheese at Home

3 years ago – Two Spinach Pies and Spinach…Rice

4 years ago – Polenta, Sempre Polenta and Broccoli

5 years ago – Two Rrrrrye Breads (Raisin and Riga)

Bird Cherry Cake or Cheryomukhovy Tort adapted from the recipe on the bird cherry flour package by aiuduhlesa.ru. Will make a huge multi-layer cake with distinct – or should I say never heard of? – flavour and dense crumb.

Ingredients:

  • 6 (!) eggs
  • 100 g sugar
  • 300 g all-purpose flour
  • 300 g bird cherry flour
  • 180-200 ml sparkling water – mine has lost its bubbles, see remarks
  • 1 heaped tsp baking soda
  • juice of half a lemon
  • 3 cups of high fat sour cream (smetana), for the icing – used less, see remarks
  • 5 Tbs sugar, for the icing – used a mixture of powdered and regular sugar

Procedure:

Beat the eggs with sugar until foamy. Add half of the sparkling water (100 ml) but do not stir. Add the flours and start mixing the batter with a spatula or a spoon (do not beat). Pour lemon juice onto the soda (it will bubble like hell) and add it to the batter. Gradually add the remaining sparkling water: your batter should resemble thick sour cream (I had to add more water). Leave the batter for about 10 minutes. It should get all bubbling and airy (mine was not…).

Divide the batter between two greased round pans (26-28 cm in diameter) and bake in the preheated oven for 30-40 minutes at 180’C. Leave the layers to cool completely.

Meanwhile, get your icing / filling ready: beat the sour cream with sugar pretty well until the sugar dissolves. Cut each cake layer in half (I did it with the help of a special string but you can do it with a thread or a knife) and start building the cake. Take a half and place it on a plate cut side up, spread the sour cream filling and cover with the next layer,again cut side up. Proceed till you have your last layer, this time placing it cut side down on top. Ice the top layer with the remaining sour cream and decorate it with grated chocolate or some bird cherry flour (see remarks).

Bird Cherry Cake

Remarks: 300 g of bird cherry flour seemed like a lot after I added all the all-purpose flour to the batter. I wonder if you should actually use less of whether it’s just that I used less soda and still water instead of sparkling? Yes, I thought we had some sparkling water in the fridge and it turned out to have lost its ‘bubbling power’ by that time. Three cups of sour cream might also seem a bit too much but in the end you do get a lot of layers! I would add more sugar to the batter and use all the three cups of sour cream next time. And yes, although there’s no butter or oil in this recipe, there are SIX eggs 🙂

Bird Cherry Cake

As for the decoration, I sprinkled the top with finely ground flaxmeal – it’s rather neutral in flavour and taste, which doesn’t interfere with the bird cherry flavour. I did it not only for the sake of the desired ’85’ pattern but also because the top layer sour cream mixed with sugar and left overnight (although in the fridge) tend to acquire a brownish colour (no fear, it’s only natural!). So you would actually need something to decorate the top with (leave it to the last moment before serving) in case you’re not planning to serve the cake straight away. Leaving the cake in the fridge overnight is preferable so that the layers soak in the sour cream. 

Result: A big cake with the unusual flavour and the traditional sour cream filling which looks like a chocolate cake and yet is not. With minor changes to the recipe this can make a pretty good (birthday) cake. 

Snowy Saturday

Bird cherry tree is closely associated with the coming of spring: it blossoms lavishly in May, emitting its perfume all over the place. And since the weather changes back to cold for several days at exactly the same moment, there’s this persistent belief that it’s not a mere coincidence. In brief, when you see a bird cherry tree ready to show off its white flowers, there will be some cold days ahead. It works every year.

Snowy Saturday

We are quite far away from May now…

Snowy Saturday

Woke up today to seeing this outside our windows:

Snowy Saturday

And yet the days are growing longer and there’s even more light with all the snow. And you start hearing birds. Winter is beautiful but it’s just so long.

Snowy Saturday

This post goes to the Russian and Sweet recipe collections.

G.

sweet

Whole Wheat Biscotti with Chocolate and Pistachios

Whole Wheat Biscotti with Chocolate and Pistachios

Inspired by a colleague who brought us some Iranian pistachios to the office (those were good!) and another colleague who baked her own sukhariki (Russian for rusks) recently, I just had to make some biscotti too. With pistachios.

Whole Wheat Biscotti with Chocolate and Pistachios

I ended up following an American take on an Italian recipe and using Greek pistachios, Russian chocolate and dried fruits from Finnish muesli which do not necessarily come from Finland as you can imagine 🙂 And that having in mind to ‘finally follow a recipe to the letter’. No way!

Whole Wheat Biscotti with Chocolate and Pistachios

A year ago – Architectural Walks in Kolpino Part 5 – Around Railway Station

Two years ago – Old-Fashioned Apple Slab and Greek Crumble

Three years ago – Vermont Sourdough and Yellow Roses

Four years ago – All the Soviet Children…

Five years ago – Flammekueche

Whole Wheat Biscotti with Chocolate and Pistachios adapted from Chocolate, Raspberry, and Walnut Whole Wheat Biscotti on www.kingarthurflour.com will make crunchy sweet rusks, almost 100% whole wheat if you follow the recipe 100%. The recipe is on the website; here are my changes and remarks:

Ingredients: had to use a mixture of wholewheat flour + a bit of all-purpose flour as the batter seemed too sticky to handle; added less salt; instead of freeze-dried raspberries (what are they anyway?) used raisins and other dried fruits from muesli; used whole pistachios instead of chopped walnuts.

Procedure: did not flatten the logs that much for the first bake and thus the biscotti turned out smaller (shorter) in size; the procedure might take some time but there’s something so enjoyable in it that you’ll want to do it again.

Whole Wheat Biscotti with Chocolate and Pistachios

Remarks: Already after the first bake the biscotti (or rather logs of biscotti) looked pretty attractive with a crack along the top. Be careful with the timing: during the second bake you’ll have to flip the biscotti over halftime through and they might seem not that crunchy enough. However, 10 minutes after they will be more than crunchy, believe me! By the way, these biscotti do not contain any butter or oil. I would add less sugar next time, as chocolate and dried fruits already contain sugar.

Whole Wheat Biscotti with Chocolate and Pistachios

Result: Chewy, crunchy, sweet. The pistachios (from Aegina) I used were slightly salty which added that little something in contrast to the sweetness of the chocolate. The (original) raspberries should have contributed to the appearance too, however even with the modest raisins these biscotti have a very rustic look.

Want more biscotti? Try these Almond Biscotti or the Greek Ouzo and Pistachio Paximadia or simply Biscotti.

Thanks God we’re past the shortest days of the year, the light will gradually come back, drop by drop. We’re having no snow and consequently no sun here in St Petersburg. Wearing sneakers at the end of December reminds of my other December, 6 years ago in Thessaloniki, almost entirely spent in a T-shirt 🙂

This post goes to my Chocolate and Sweet collections.

P.S. Domes of the St Sophia Cathedral in Veliky Novgorod on some of the photos on a Catholic Christmas Eve unintended.

G.